Tuesday, March 29, 2011

Master Bathroom Reveal

Yes, friends, the day has arrived. Today I will unveil our almost completed master bathroom. I say almost because we are still waiting for the drawer hardware and plantation shutters to be installed. However, you have been so patient that I can't make you wait any longer. 

Thank you for sticking with me through the planning, process, excitement, complaints, tantrums and fun of this remodel. It's been a rollercoaster. I've enjoyed the ride. But, I'm glad it's almost over.

Let's take a little stroll down memory lane, shall we? Enjoy your last look at the lovely yellow wallpaper, white carpet, and indoor swimming pool bathtub.


I'm sure this bathroom was quite a gem back in the late 80s, but she definitely needed a makeover. Are you ready to see what she looks like today?  Come on in...


You may be wondering, "Carolyn, you just lived through your first major home remodeling project. What are you going to do now?"

Well, folks.... "I'm going to Disneyworld!" 

For the next few days, the only houses I care about are Cinderella's Castle and Mickey's Toon Town home. I hope you'll meet me back here when I return, because I've got lots more projects in the works.


Cheers!


I'm linking up to...

Show and Share Day at Just A Girl
Whassup Wednesday
Wow Us Wednesdays
Swing Into Spring
Tuesday's Treasures
Share the Love Wednesday
Transformation Thursday
Open House Party Thursdays
Show and Tell Friday
I Party at Type A
DebbieDoo's Blogging and Blabbing Newbie Party
Metamorphosis Monday


beforeAndAfterButton


Monday, March 28, 2011

Plumbing for Dummies

Remember this faucet that I was supposed to install a week ago?


Well, I finally got around to it yesterday. Better late than never, right? It's not entirely my fault that the project was delayed. Let's just say the directions were not exactly user-friendly.

Here's how it went:

I breeze through the first 4 steps in the installation process. Of course, they basically consist of turning off the water supply and making sure all the contents of the box are in tact. Still... I was feeling pretty good about myself. Then I got to steps 5 and 6, which looked like this...


Okay. That looked easy enough. Put the 2 round plates together and attach to the faucet body. Check. Put the 2 deckplate pieces together and attach them to the round plates that were just attached to the faucet body. Check Wait. What is going on here? The deckplate does not fit onto the round plates. (Insert bad words).

I try every which way to get the pieces to snap together, and nothing works. Obviously, the faucet is defective. Just my luck. I got a lemon.

Fast forward a few days later. I march my defective faucet right on back into Lowe's. Someone is going to hear about this. I can't wait to tell the guy in the plumbing department exactly what I think about this faucet and its lousy directions. Hmmph!

I head to the plumbing department and proceed to demonstrate for the salesperson how I follow the directions exactly and yet the pieces do not fit together. I expect to hear how sorry he is that they sold me a flawed product, that I am right... it sure doesn't fit together the way it should, etc., etc.  But, instead he says, "Oh. You're supposed to use one or the other. The round plates if you're just covering one hole in the countertop. The deckplates if you're covering 3 holes."  Oh. Whoops. I feel dumb now. "We get that all the time," he adds, but I'm sure he's just trying to make me feel better. I leave with my tail between my legs.

So, the first lesson in Plumbing for Dummies is to read the instructions carefully I know it seems most logical that Step 5 should be followed by Step 6. But as we have just discovered, sometimes one must choose between Step 5 and Step 6, even if that is not clearly stated. Have I confused you? Or just myself? Simply put, if you are putting something together and the pieces don't fit, you may in fact not need one of the pieces.

Back at home, I removed the original faucet which looked like this...


(I know. It's difficult to believe I could part with such a beauty. But don't worry. I've still got another one.)

There was a LOT of elbow grease needed to unwrench the 20 year old fixture and the pipe below. This brings me to our second plumbing lesson. When you disconnect a pipe, it stinks. Literally. It was one of the foulest odors I've ever smelled, and I live with a lot of boys.  The pipe was nasty, so I cleaned it within an inch of its life.

I was able to follow the rest of the instructions quite easily, and voila...


The new faucet is in!  And, just in case you are still doubting my plumbing skills...


It works! It really works! Guess I ain't no dummy after all :)


Wednesday, March 23, 2011

March Madness

Today was sunny and in the 70s, and I was able to spend some time doing yard work. Spring was in the air...


and coming out of the ground.


There was a quick, light rain in the early evening, followed by a beautiful rainbow...


And, the day ended with tornado sirens sounding and the kids camping out on my bedroom floor.

Tomorrow is expected to reach a high of 38 degrees. Brrrr.... So much for Spring!


Tuesday, March 22, 2011

Announcing a New Feature

I love looking at the gorgeous homes found in design books, magazines and blogs. But, I also really enjoy seeing how every day people choose to decorate their spaces. Some of the prettiest homes I've visited may never show up on glossy pages at the newstand, so I'm going to show them to you here at Sweet Chaos.

I happen to have several friends who have great style, and I'm going to introduce you to them in a new feature called "Friendly Places." I'm excited to take you into the real homes of real people. Hopefully, you'll find something that inspires you. And, the great thing is that you'll be able to leave comments for the homeowner if you would like more information on things you see.

I thought I'd start out by sharing the home of my very best friend, Courtney. She lives on a beautiful cove in the Pacific Northwest. If anyone should be blogging about design (home, fashion, or otherwise), it's Courtney. I'm so excited to show you some pictures of her gorgeous home.


I hope you enjoyed this little tour of Courtney's home. I can't decide which view is better... inside or out?

I'm looking forward to introducing you to some more "Friendly Places" soon!


Saturday, March 19, 2011

An Update on the Bathroom and A Bathroom Update

I am sure you have all been sick with worry over what happened with our marble countertop. Okay, well, perhaps not. However, if you are the least bit curious... the crisis is over. If you weren't aware there was a crisis, you can read all about it here.

Mister Marble came out to work his magic, and he was able to get the little "pits" much smoother. He also re-polished the countertop. It's an improvement, but it's not perfect. We had a decision to make. Ask for a replacement or ask for a refund. My husband was most definitely leaning toward the refund. He wanted this job DONE. Yesterday. Replacing the countertop would mean weeks or even months of waiting.

I was in favor of asking for a replacement. However, I did a lot of research and called several marble suppliers and fabricators. Two of the suppliers said that for the past 10 years or so, the carrara marble has been coming in with "bubbles." That sounds nicer than "pits," doesn't it? 

After much debate and many sleepless nights, we ended up negotiating a refund that we were pleased with.  Now we can finally finish this project!!  I'm hoping my camera cooperates, and I can take some nice photos of the finished bathroom and post them this week. 

In the meantime, I decided to make some small changes in my boys' bathroom vanity area. I replaced the shiny brass towel racks with the oil-rubbed bronze ones that were previously in our master bathroom.

Before...

and After...


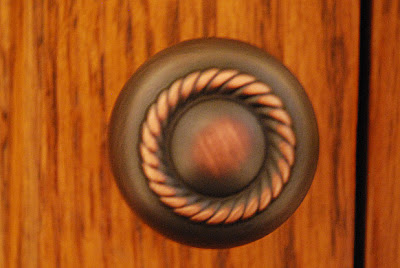
I also replaced the plain brass knobs with something a bit more interesting...


And, hopefully, this weekend I will be replacing the current faucet...


with this...


As I worked on these small projects, I discovered some material for my first-ever tutorial. I'm quite certain the topic has never been covered by another blogger. I'm thinking of calling it, "How to clean up after boys who brush their teeth in such a manner that more toothpaste ends up in the cabinet drawers and on the walls than on their teeth."  Case in point...


YUCK. I'm wondering how my children could even get the toothpaste up as high on the walls as they did.  I envision them filling their mouths with toothpaste and shaking their heads like wet dogs until the paste splatters in every direction.

The toothpaste on the walls came off quite easily with my handy dandy Clorox wipes. The toothpaste plastered to the drawers required the use of a screwdriver to pry it free, and then a good 'ole scrubbing. To avoid the mini-toothpaste sculptures from forming on the wood drawers in the future, I lined the drawers with my all-time favorite shelf liner...


Ahhh... that's better...


As I measured and cut the shelf liner, I wondered why I hadn't done this sooner. I mean, it only takes a few minutes of time.

But when I went downstairs and found our dog happily chowing down on food that my 2-year-old was shoveling repeatedly into her bowl, I remembered why I don't get these seemingly small projects done. I'll probably be cleaning up after the over-fed dog in a couple of hours, if you know what I mean...

Tuesday, March 15, 2011

Slightly Distressed

I was going to title this post, "The Big Reveal."  However, if you have been following my blog for any amount of time, you would assume I was talking about the "reveal" of our master bathroom remodel.  I figured it would be cruel to tease you like that.

I wish I were unveiling the remodeled bathroom, but alas, we are at least a week away from that.  If you're visiting for the first time, here is a peek at the remodel. Since I have no ability to speed the remodeling process, I figured I'd get to work on some projects that I can control.

In my last post, I introduced you to this little nightstand...


It was a cute piece, but its simple white coat of paint wasn't helping to bring out any of its detail.  So, I turned it into this...


After sanding it, I painted it with Sherwin Williams' "Halcyon Green." I chose that color because it is in the same color wheel family as my beloved "Rainwashed," which I used on my bedroom walls.


A friend of mine, who does a lot of furniture refinishing, suggested I use a particular glaze that she swears is the best ever. I didn't. I wanted to, but her glaze had to be ordered online and patience isn't my strong suit.

Instead I chose a glaze that had a similar name to the one she uses. (I know. I know. Don't judge.) I was using the glaze to slightly distress the table, but it was slightly more distressing to me. I haven't worked with glaze in about 8 years, and I don't remember it drying as quickly as this one did.  After a while, I got into a groove of applying the stain and buffing with a damp cloth.


I think it turned out pretty good for my first attempt.

I'm linking this post to...


Photobucket


HOG


Domestically Speaking
[buttonwithstarfish[3].jpg]
Furniture Feature Fridays


My Uncommon Slice of Suburbia